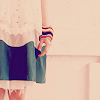
 >>>>>>
1. start prepping your base (cropping, sharpening, blurring blemishes etc.)
2. duplicate your base and set it to screen (this step really depends on how dark your images are, my bases are all screened to 100%)
3. Create a new layer. Fill the new layer with #232A81 and set it to exclusion at an opacity of 100%
4. New adjustment layer >>> brightness/contrast
(again, this step varies with the brightness of your base from the start)
brightness = -49
contrast= 37
5. new adjusment layer >>> selective color
Reds:
C = -82
M= +16
Y= +71
B= +3
Yellows:
C= -80
M= +7
Y= -100
B= -17
Greens:
C= +100
M= +45
Y= -100
B= +74
Cyans:
C= +97
M= +17
Y= -100
B= +48
Blues:
C= +100
M= +12
Y= -15
B= +7
Whites:
C= +100
M= -25
Y= -100
B= -19
Neutrals:
C= -20
M= -6
Y= -15
B= -7
Blacks:
B= +5
Ok... now for the tricky part~ My photoshop has now and forever been broken making everything i edit on photoshop appear brighter and yellower. Meaning when I save it, it looks way darker and less yellow than what i expected.
So there's 2 ways to end this tutorial~
option one: if your photoshop is normal unlike mine:
create a new layer and fill it with a bright yellow(i used #FFEC82) then set it to softlight and adjust to your liking. In my case mine is at softlight 48%
option two: FOR US CURSED PEOPLE WHO PHOTOSHOP PLAYS WITH ;_____;
just press the print screen button on your keyboard and then press ctrl + v. Then crop out the yellower version of the icon you had just made. When you save it it'll have the coloring you're supposed to have.


